
| HELP TOPICS |
| OTHER |
Improved navigation
This tutorial will teach how to modify the look and features of generated albums beyond what can be done through the user interface of JAlbum. Nothing is actually fixed layout-wise with JAlbum so having UI elements for everything would be impossible or limit your design power. Don't be frightened by the coding that will follow. If you know basic HTML, that's all you need.
Albums created with JAlbum usually have "next" and "previous" buttons to simplify navigation between images, but what if you'd like "first" and "last" buttons too? This tutorial will show you how. Follow these steps and you will probably realize how easy it is to make other types of modifications too.

Showing previous and next buttons on the "standard" skin
1. Open skin for editing
If you have played around a bit with JAlbum you have noticed that it can generate a lot of different album styles or themes. I call these themes "skins". Here we are going to modify the "standard" skin. Start by pressing the pen button while having the "standard" skin selected. A directory will open on your desktop. (If this doesn't work on your computer, open the directory where JAlbum is installed and then open the skins/standard folder)

Opening the "standard" skin for editing
The directory of the "standard" skin opened
We are going to concentrate on the res (resources) directory and slide.htt file. The res directory contains all graphic elements and other support files needed for an album. It is copied to the output directory when an album is being created. We will need to create two more gif buttons there: first.gif and last.gif, finally we will edit the slide.htt file to have the buttons appear but let's make the new buttons first.
2. Create button graphics
Open the res directory and drag and drop the image files there onto your favourite image editing program. I use Paint Shop Pro, but you can use any paint program capable of handling gif files like Paint. Now use the "next.gif" and "previous.gif" files as base to make "first.gif" and "last.gif" images. Why not also give the navigation buttons a personal touch while you're being creative?

Using Paint Shop Pro to design a "last" navigation button
3. Edit the slide.htt file
Now start Notepad or similar text editor and open the slide.htt file for editing. Tip! Use drag and drop, it's a great time saver. Locate the section where there is a "Previous button" HTML comment. Add the following code before it:
<!-- First button -->
<A HREF="$firstPage"><IMG SRC="$resPath/first.gif" BORDER=0 ALT="First page"></A>

Using Notepad to add first and last navigation links. The addition highlighted
As you see, a slide.htt file is almost an ordinary html file. It is a "HTML template" file and is used as base for all slide files that JAlbum generate using the "standard" skin. I guess you noticed the $firstPage code in the example above, it is a variable that gets replaced by a link to the first page upon album generation. There is also a $lastPage variable that you can use to create the last page button. Insert that code after the code for the "next" button. The $resPath variable will always point to the res directory of the generated album, even if referenced from a subdirectory/subalbum.
JAlbum has a lot of other variables that you can use and you might wonder what the <ja:if elements do. This is all explained in the Creating skins section, but please try the new album first, we are almost done.
4. Make an album
Save the changes made to slide.htt. It's time to view the result. Prepare JAlbum for the images of your choice, select the "standard" skin and press "Make album". Click on a thumbnail to get to the slides and voilà! If you've done everything right there are now two new navigation buttons, if not, check your code, save and retry.
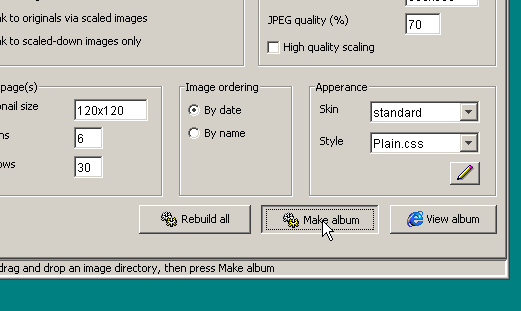
Testing the effect of our changes by making an album

The album with the new first and last buttons
I hope this example has made it obvious that JAlbum actually allows you to create any imaginable album design. You basically only need HTML (and CSS) skills to create new skins. If you make something beautiful, send it to me for inclusion into JAlbum. Put your name inside the templates to have free marketing of your design skills as users create and publish albums with your skin design.