
| HELP TOPICS |
| OTHER |
Quick start
Assuming you have installed and started JAlbum successully, let's create our first web photo album in three simple steps:
1. Select image directory
Creating an album is really simple. Drag and drop a folder/directory containing images to the "Image directory" section of the JAlbum window. (JAlbum reads JPEG, GIF and PNG image files and many movie files)
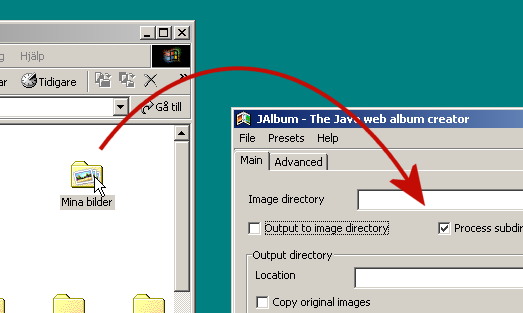
2. Select output directory
To select output direcory, simply drag and drop a folder/directory to the "Output directory" section like you did with the image directory. As an alternative you can check the "Output to image directory" checkbox to have the album generated in the image directory instead.
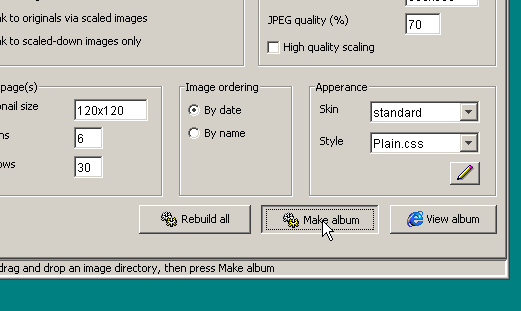
3. Press "Make album"
You can now select the appearance of your album by selecting different skins and styles (variations to a skin). Finally press the "Make album" button. Wait for generation, then press "View album" to view the new web album in your browser. If you like to adjust things, do that and press "Make album" again followed by "View album".
Total workflow
JAlbum tries to do it's central task (album generation) best and leave other types of operations to other programs. Image rotation and comment editing is however now included. See the "Edit" tab. Use an ordinary image editor to sharpen, crop and color balance images. Another free program to add comments to and rotate jpeg images losslessly is Exifer by Friedemann Schmidt. Use the "publish" feature of JAlbum to upload the generated album to your web server through FTP or use an external FTP tool like SmartFTP. Alternatively you can burn the album onto an auto running CD-ROM